Snippet 7: adding plugins for endless-pagination, facebook login, autocomplete, and PIL

Super awesome email from my best bud Ant (shout-out here) to add several frequently used plugins for our django project. All these works to a T for me. Thanks Ant!

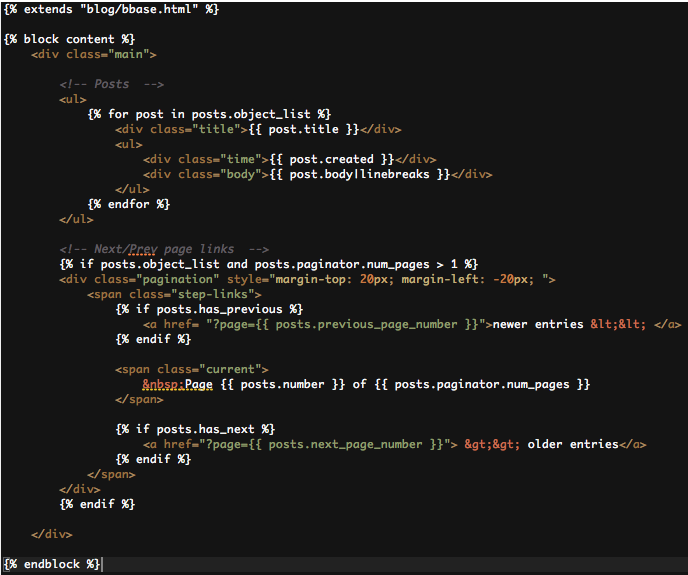
1) Added pagination (Django-endless-pagination)

Key feature: allow us to extract chunk by chunk from database and present it on front-end in pages. Clean display and efficient database extraction. Can possibly do the facebook endless scroll display too.

To get it go to terminal and type:

$ pip install django-endless-pagination

2) Added facebook login: (Django allauth)

To get it installed on ur local comp go to terminal and type:

$ pip install django-allauth

If that gives errors during runtime, den get addional support by going to terminal and type:

$ pip install -e git://github.com/pythonforfacebook/facebook-sdk.git#egg=facebook-sdk

If that still fails, go to settings.py and set:

USE_TZ = False

3) Added an autocomplete plugin (django selectable)

Key feature: allow autocomplete from our database, works with foreignkey, manytomany etc..

To get it installed:

$ pip install django-selectable

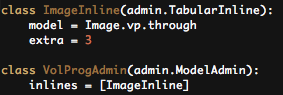
4) Impt restructuring – images: Add PIL

First get python imaging library (PIL) installed:

Step 1 – Get JPEG support:

$ curl -O http://www.ijg.org/files/jpegsrc.v8c.tar.gz

$ tar zxvf jpegsrc.v8c.tar.gz

$ cd jpeg-8c/

$ ./configure

$ make

$ sudo make install

Step 2 – Get Freetype support:

curl -O http://ftp.igh.cnrs.fr/pub/nongnu/freetype/freetype-2.4.5.tar.gz

tar -xvzf freetype-2.4.5.tar.gz

cd freetype-2.4.5

./configure

make

sudo make install

cd ../


Step 3 – install PIL

$ pip install PIL

Images are now stored in the following fashion:

All images still have 1 link, for example:

Images.link = “ngo_images/HueHelp/1.jpg”   (previously “/site_media/images_beta/ngo_images/HueHelp/1.jpg”)

You can access the different sizes of the image by concatenating that to the following:

/site_media/images_beta/thumbnail/ – 60px by 60px (~1-4kb)

/site_media/images_beta/small/ – 300px by 300px (~20kb)

/site_media/images_beta/large/ – 900px by 900px (~100-200kb)

/site_media/images_beta/original/ – whatever

So for example if you are passing an ngo object, and you want to display the link to its logo:

<img class=”ngo_avatar” src=”/site_media/images_beta/small/{{ngo.logo}}” alt=”{{ngo.name}}”/>

Posted in Snippets | Leave a comment

Snippet 6: extending or specifying Model Instances

Refer to documentation here

More specifically for def __str__(self):

“The __str__() method is called whenever you call str() on an object. The main use for this method directly inside Django is when the repr() output of a model is displayed anywhere (for example, in debugging output). Thus, you should return a nice, human-readable string for the object’s __str__().” 

Example:

Screen Shot 2013-02-18 at 3.02.43 PM

Error: if you put an integer here it will throw a type error!

Screen Shot 2013-02-18 at 3.04.43 PM

The error would look like:

TypeError at /admin/
__str__ returned non-string (type datetime.date)

Solution is to use python’s conversion to string method  str():

Screen Shot 2013-02-18 at 3.04.59 PM

Posted in Snippets | Leave a comment

Snippet 5: Using fieldsets to customize admin page

We can use fieldsets to make admin page more organized:

1. In admin.py, under your class’s admin, create the fieldsets:
Screen Shot 2013-02-16 at 11.39.00 PM

Notice the brackets used in {  ‘fields’:[( A , B ), C , D]   }  This allows attributes grouped by () to be displayed within the same line:
Screen Shot 2013-02-16 at 11.42.40 PM

Here’s django’s documentation on fieldset


Posted in Snippets | Leave a comment

Snippet 4: Adding inline to admin for both ForeignKey and ManyToManyField

1. Foreign Key Method: Refer to Tutorial 4 (Part 2)

Note: using this same method for ManyToManyField will cause an error

2. ManyToManyField:

a) Under admin.py, create an inline class:
Screen Shot 2013-02-16 at 11.00.38 PM
Note: the class must be created before the admin class.. python compiles from top
Note: ‘vp’ is the variable name of the ManyToManyField in ‘Image’ that links both tables.. see the Image Class to understand:
Note: you must include ‘through’.. it tells django to use the table – that links VolProg and Image tables together – as a model to construct the inline class

Screen Shot 2013-02-16 at 11.03.54 PM
Screen Shot 2013-02-16 at 11.04.42 PM

b) of course, don’t forget the basics to import the admin, models, and register the admin
Screen Shot 2013-02-16 at 11.00.50 PM

Screen Shot 2013-02-16 at 11.00.57 PM

Here’s how it looks like:
Screen Shot 2013-02-16 at 11.42.52 PM

if you still don’t get this brief example, try this stackoverflow link

Posted in Snippets | Leave a comment

Snippet 3: Reset DB, See SQL statements, SyncDB

(python manage.py reset appName )  — reset whole database

( python manage.py sqlclear appName ) —- sneak peak DROP statements, use ( python manage,py dbshell ) to execute the drop statements

( python manage.py sql appName ) — sneak peak SQL statements to add TABLES

( python manage.py syncdb )   — sync database

Posted in Snippets | Leave a comment

Snippet 2: Dropping individual table

See this: http://stackoverflow.com/questions/2286276/how-do-i-drop-a-table-from-sqlite3-in-django

get the DROP statements with

python manage.py sqlclear <app name>

then try

python manage.py dbshell
and execute the DROP statement

And this: https://docs.djangoproject.com/en/dev/ref/django-admin/#sqlclear-appname-appname

Posted in Snippets | Leave a comment

Snippet 1: Understanding ForeignKey and M2M

Understanding ForeignKey and ManyToManyField in models.Model:

1. ForeignKey declares Many-To-1 relationship

– uses variable to access PrimaryKey

– puts ‘Many’ of itself as ‘set’ to PrimaryKey object

………………………………. \

VolProg (ForeignKey) ——- (PrimaryKey) Ngo

……………………………….. /

2. M2M declares Many-To-Many relationship

– uses variable.all to access all ‘Many’ PrimaryKeys

– puts ‘Many’ of itself as ‘set’ to PrimaryKey objects

………………………………. \ ……… /

VolProg (M2MField) ———- ———-(PrimaryKey) Ngo

……………………………….. / …….. \

Posted in Snippets | Leave a comment

Tutorial 10: Installing Subclipse SVN for Eclipse

Step 1: install MacPorts (if you don’t have it yet)
http://www.macports.org/install.php

Step 2: install javaHL using MacPorts
http://subclipse.tigris.org/wiki/JavaHL

this might take a while… go grab a cup of coffee

Step 3: install subclipse from Eclipse
http://subclipse.tigris.org/servlets/ProjectProcess?pageID=p4wYuA

“You can tell if JavaHL has loaded by looking at the Eclipse preferences under Team > SVN. If the library loaded correctly you will see the version of the library, otherwise it will show “Not available”. If a version of the library that is too old to use is found, then we do not load the library and it will show as “Not available”.”

Alternative Tutorial + Learn how to use SVN on Eclipse
http://www.ibm.com/developerworks/opensource/library/os-ecl-subversion/#resources


Posted in Tutorials | Leave a comment

Day 10: Hooray a completed project

Have been on and off on Django for the past 3 weeks… and it is with much joy that I proclaim to have finished my first ever completed project on django. Although its a small one, and i followed a (slightly erratic) tutorial, I managed to understand a good bit about how the model, view and url system works in Django. I also managed to fix quite a few bugs along the way. Overall I think it is a good milestone.

Proceeding from here, I think its time to get a little bit more fundamental and delve into the theory. My thinking is that if i continue to build more apps, I will meet a lot of problems, and not understand much of what I am doing. I think I want to take some time to learn from the official Django Book.

My future steps will be to read up, and do some practices, from the Django Book. Probably cover a few of the more important chapters, before taking a crack at a real project that I have been wanting to build. Spoilers here… it could be either a travel inspiration site, or a gym routine site. I hope to get there in 2-3 weeks time.

Okay let’s go!

Posted in Progress Bar | Leave a comment

Tutorial 9: ToDo List App

Tutorial used: http://www.lightbird.net/dbe/blog.html

Structure of a Standard Project:
Screen Shot 2013-01-19 at 5.13.49 PM

Steps taken:

 1-5: Follow steps 1-5 in Tutorial 8

6. start the blog app
– ( python manage.py startapp blog )

7. create the models for ‘blog > Post’
– edit blog/models.py
– remember to import ‘models‘ and ‘admin
Screen Shot 2013-01-11 at 11.31.21 PM

– include appname ‘blog‘ in settings.py > INSTALLED_APPSScreen Shot 2013-01-11 at 11.32.01 PM

8. activate the models for ‘blog > Post’:
– sneakpeak with ( python manage.py sql todo )
– ( python manage.py syncdb )

9. set the template directory (Important Concept: TEMPLATE_DIRS provide the path to your static files)
– edit settings.py > TEMPLATE_DIR to point to where your templates reside
Screen Shot 2013-01-12 at 5.05.36 PM
– to use a particular template, provide the path from that path, e.g.:
Screen Shot 2013-01-12 at 5.06.46 PM

10. create the view for ‘blog > Post > main’:
Note here that I have made edits to the original tutorial to make this work
a. set the url path
– i) edit dbetutorial2/urls.py to point to blog/urls.py
Screen Shot 2013-01-12 at 5.50.26 PM

– ii) edit blog/urls.py to point to view blog.views.main ( Important Concept: you can use prefix to reduce repetition )
Note: you can add or not add the ‘url’ syntax in front of the regular expression
Note: both methods below works to point the url to the view
– method 1
Screen Shot 2013-01-12 at 5.50.49 PM
– method 2:
Screen Shot 2013-01-12 at 5.50.35 PM

b. create the view logic
– edit blog/views.py
– i) load html static files: use blog/list.html, relative path from the TEMPLATE_DIR
– ii) load models: use blog.models import *, relative path from PYTHON_PATH
Screen Shot 2013-01-12 at 5.11.01 PM

c. create the view static files:
– use terminal to create templates/blog/bbase.html and templates/blog/list.html files
Screen Shot 2013-01-11 at 11.56.13 PMScreen Shot 2013-01-11 at 11.56.00 PMScreen Shot 2013-01-11 at 11.55.37 PM

– edit bbase.html and list.htmlrespectively
Screen Shot 2013-01-12 at 5.11.52 PM Screen Shot 2013-01-12 at 5.12.17 PM

Note: Hooray! At this point, you should be able to run server and see this:
Screen Shot 2013-01-12 at 6.01.12 PM

11. create the view for ‘blog > Post > post’:
a. create url link from list.html
Screen Shot 2013-01-19 at 4.13.26 PM

b. add link to blog/urls.py to react with blog.views.post
Note here i got stuck for a bit:
1. Putting the url path in front gives it priority matching (i.e. if i placed the second url shown in diagram in front, the page will always load the second one first for localhost:8000/blog/<anything>

Screen Shot 2013-01-19 at 4.13.41 PM

c. in blog/views.py, get post to render static file blog/post.html

Screen Shot 2013-01-19 at 4.13.55 PM

d. create templates/blog/post.html (optional to extend blog/bbase.html) to display

Screen Shot 2013-01-19 at 4.14.11 PM

12. creating Model and View for  commenting:  ‘blog > (models.py) > Comment’
a. create Comment Model: add to blog/models.py:
Screen Shot 2013-01-19 at 5.07.11 PM
Note: Remember to do a database reset after
– python manage.py reset blog
– python manage.py syncdb

b. create URL link to View: add to blog/urls.py:
Note: here the url links to localhost:8000/blog/add_comment/<post_id>/
Screen Shot 2013-01-19 at 5.09.34 PM

c. create add_comment function: edit blog/views.py:
Screen Shot 2013-01-19 at 5.11.38 PM

Screen Shot 2013-01-19 at 5.11.54 PM

d. edit Post View to display comments: edit blog/views/py:
Screen Shot 2013-01-19 at 5.12.14 PM

e. add Comment Static display: edit templates/blog/post.html
Screen Shot 2013-01-19 at 5.13.04 PM


And the Final Product!

Screen Shot 2013-01-19 at 5.25.24 PM


Posted in Tutorials | Leave a comment